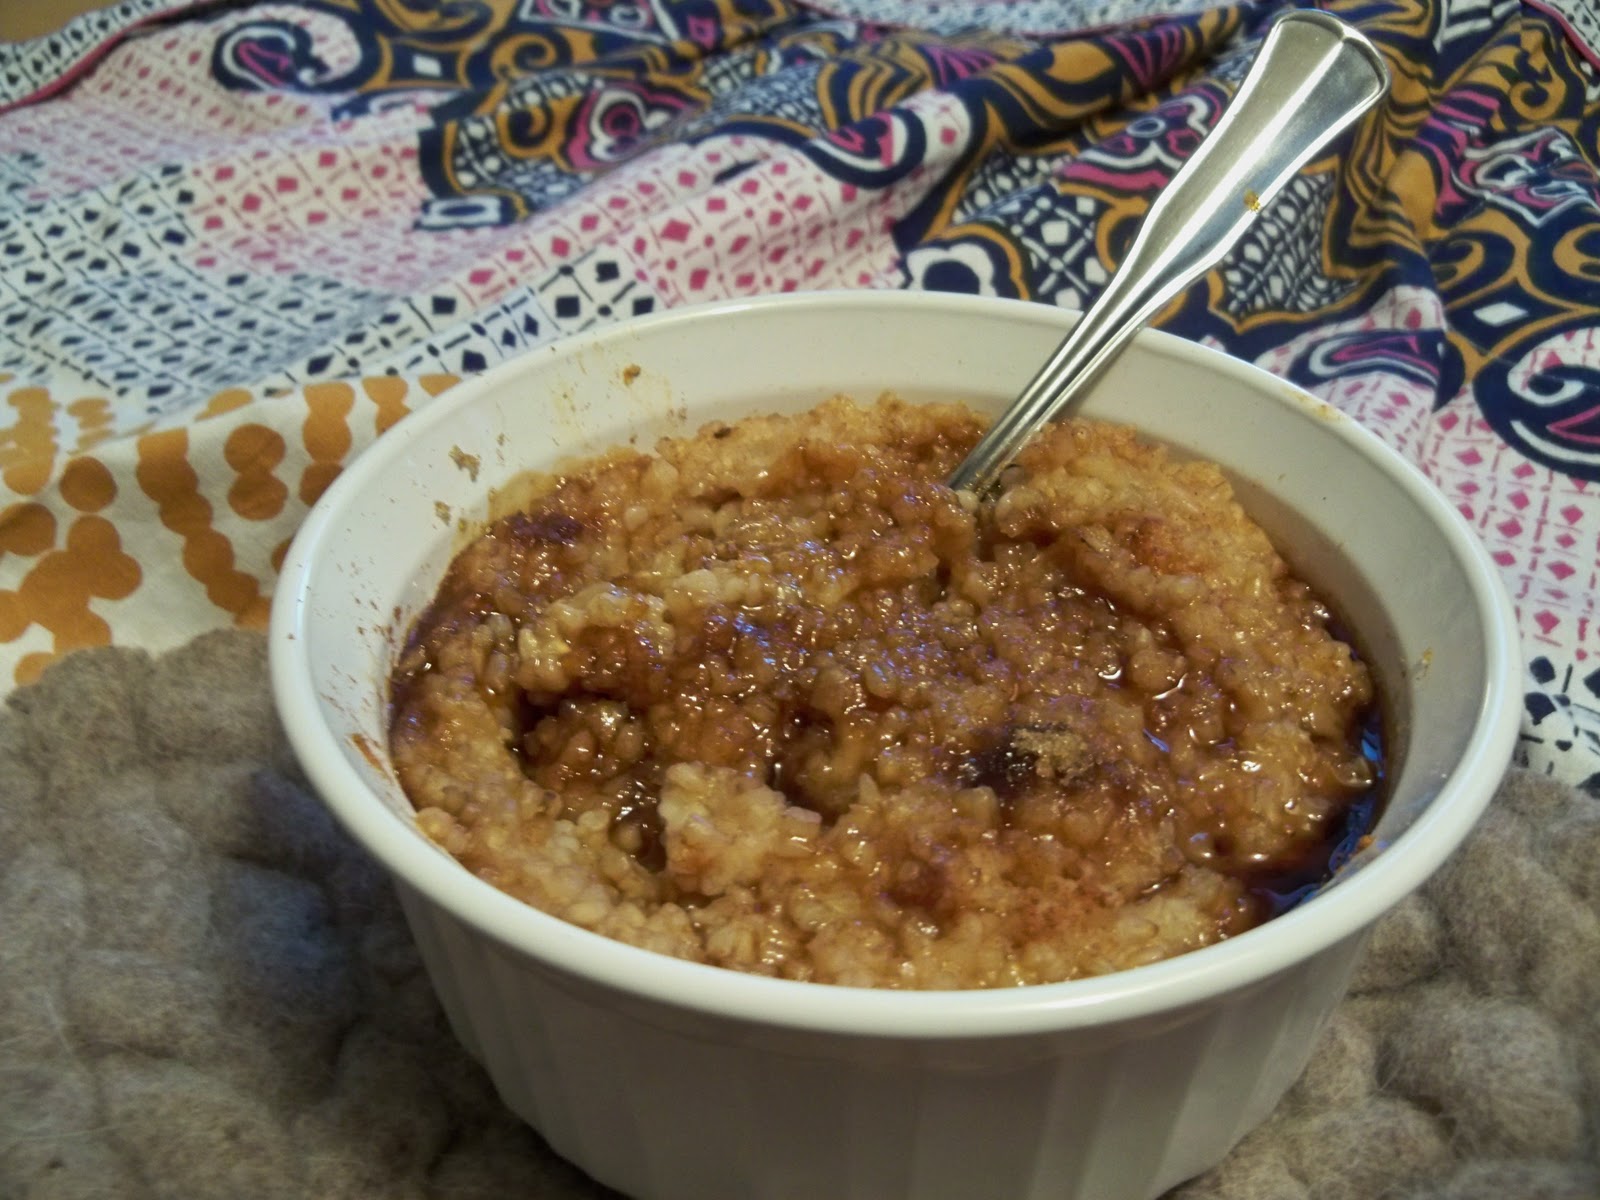
Monday, February 28

Oh! natural

Lately, I have been so drawn to foods that require natural cycles (such as sprouting, fermenting, etc.) to make. As I have mentioned before, I am on quite the sprouting kick these days... I am sprouting EVERYTHING! Sprouting is so simple, and you can sprout just about every whole seed or grain in the bulk isle, assuming it has not been altered significantly during its processing. Some I have tried with success include: quinoa, peas, barley (hulled, not pearled), and buckwheat. Of these, my personal favorite sprout of the hour is sprouted peas: they taste just like a regular pea, though you get to watch it grow before you eat it! I am in the process of sprouting some green lentils and I am also exploring the world of sprouted grains, though I have not mastered these yet and am still seeking ways to use them one they have sprouted.
Sprouts!
On another note, recall back in the fall when I mentioned that I had attended a Milwaukee Mushroom Growers meeting? I have been a bit under the radar with this endeavor, as it is a bit slower of a process than sprouting. However, I have lately (with the help of MadBioneer's resources) been able to expand some mushroom spawn that my friend Neal shared with me, and am in the process of fruiting them! More on this later. 
Step One: Layer spawn and sterilized coffee grounds in a jar covered with screen. Invert to drain and let the mycelium get to work!

I still am waiting for my mushroom spawn to take over the coffee grounds, but soon I will try my hand at  "shocking" the system, and if all goes as planned, I will have some tasty little button mushrooms in no time!

And my latest endeavor? I am trying my hand at fermentation, with a batch of homemade sauerkraut and some apple cider vinegar.
To make apple cider vinegar, just place some apple cider (without preservatives) in a large mouthed jar, covered with screen (to keep our winged friends out!). Leave it in a warm place for about 3 weeks. After one week, it should be hard cider and it should turn to vinegar after two more weeks. 

For some reason, there seems to be this stigma that homemade foods are difficult to make, and time consuming. I would have to argue differently! In this case, the natural cycles of fermentation do most of the grunt work and all I have to do is sit back and relax and enjoy the show.

Homemade Sauerkraut
I began the sauerkraut process last Sunday, by simply chopping my cabbage and combining it with salt. Then, with my fists, I pressed the cabbage into the bottom of a large bowl. This helps to break down the cabbage and allows the surface area to become coated in salt. Then, as with the apple cider vinegar, you just allow the cabbage to ferment in the brine for about three weeks. After the fermentation process has yielded the perfect sauerkraut to your likings, stick it in the fridge and enjoy it for up to 4 months (though I doubt it will last that long...) 
Photo courtesy of Straight From the Vine

Osmosis is perhaps the first natural cycle required in this recipe. Remember in grade school when we learned about osmosis? (If you have forgotten, not to worry! Check out this website). Essentially, water travels from an area of high concentration to an area of low concentration. Because the salt is an area of high concentration, the water that is inside the cabbage will leave the cabbage in effort to create an equilibrium. Thank goodness this works this way, because not only does this create a brine in which the cabbage can begin to ferment, but it also prevents the cabbage from rotting and it helps to maintain the crunchy-ness so characteristic of good sauerkraut. 

Luckily for me, my cousin in Texas is making sauerkraut for a living these days and was gracious enough to share with me her fermentation wisdom. Here are some tips from my cousin Stacey (also check out the wonderful things she is doing, at her website!):


-- Never use water because it will make your sauerkraut mushy. 
-- Use about three tablespoons of salt per five pounds of cabbage. The salt should yield plenty of brine, and you shouldn't need to add any water anyways.
-- Don't make batches smaller than one quart (about one head of cabbage). The bigger the batch, the better the flavor! 
-- Store the fermenting cabbage in an area between 65 and 75 degrees. 
-- Make sure your veggies stay underneath the brine! For this, you can use a jar filled with weights, and place it on top of the veggies, to hold them under the brine. Just keep mashing it down, to make sure it is under the brine... otherwise mold might appear (yuck!) 
-- After about three weeks, it should have its best flavor. The warmer it is, the faster it ferments, so please! Try it along the way!

Happy (natural) eating! 

Steel cut oats

Sometimes (especially around this time of year) the school semester starts to pick up and things get a little bit hectic. It seems that I have weeks where I have more meetings than hours of sleep and meals can be a bit of a rush. This is particularly challenging when you are choosing not to eat packaged foods. However, that is not to say it can't be done; a little creativity is just required!
There are several go to foods that I make when I know I am going to have a busy week and won't have quite as much time to cook as I would like, during the week. First off, my number one staple in the wintertime especially, is chili. It is so simple to make a big pot of chili on a Sunday afternoon, that will last through the week (though this is often not the case... we usually can't keep it around for longer than two or three days! we really love chili.) and gets better with age. Chili is wonderful for this, though it is not the perfect breakfast option (this is not to say that chili has never been eaten in the garden unit for breakfast).

Enter: steel cut oats. Steel cut oats are an easy fix and when prepared just right, can be stored and enjoyed for the week. This recipe is modified from a recipe that Oly, our local oat supplier from the farmer's market, provided us with! Just when you didn't think your mornings could slow down, this recipe will allow you to enjoy a home cooked breakfast on even the busiest of days.
Baked steel-cut oats
2 cups of steel cut oats
2 tablespoons of milk or yogurt
Water
2 cups of milk or apple juice
Cinnamon
Raisins (or other dried fruit or an apple!)
Salt
Brown sugar
Butter


1. Place oats and 2 tablespoons of milk or yogurt in a medium sized saucepan. Cover by about 2 inches of warm water. Cover and allow to set over night. 


2. In the morning, drain the oats and add 2 cups of milk or apple juice. Add about 4 cups of water. Add a dash of cinnamon to taste and a dash of salt to bring out the flavors. Add dried fruits. 


3. Allow to cook until the oats are tender but not mushy, stirring about every few minutes for about 15 minutes. Some liquid might remain. Remove from heat and place in ramekins or small oven-proof dishes. 


4. Sprinkle each bowl with about a tablespoon of brown sugar and place under the broiler for a couple of minutes until the sugar caramelizes and forms a little crust. 


You can either enjoy this right away or store some for the following mornings (assuming your roommates don't eat it all!) Such a treat, and really, it doesn't take too long. 


Hopefully with recipes like this, you can allow yourself to slow down, if even for just one meal. I know for me, being able to sit for meal time makes all the difference, even when I am hustle bustling around town, from class to meeting to work, etc. And it is especially nice to start the day out on a slow pace, with a hearty, healthy and tasty breakfast!


Happy eating! 

Sunday, February 20

Slow down.

The other day, Jill and I were biking home from a lovely bike ride around the city. We had spent the day visiting the Riverwest Co-op and Milwaukee Bicycle Co., and we were marinating in the joy of our city. We had spent the afternoon talking about good food and deliberate living, which is perhaps why we were so taken aback by what we saw next:

We happened to be biking past a McDonald's, as we noticed an ambulance with its sirens on, outside of the building. Though this is purely speculation it seems as though this was no coincidence that the ambulance was stopped outside of this fast-food joint which serves burgers and fries for every meal, faster than you can imagine. As we slowly biked past, we watched then, as a small boy and his mother walked out the front doors of the store: the mother was unhealthily overweight and the small boy, with a huge smile on his face, held an extra large soda in his hands that was nearly as big as his torso. There was something so disturbing about the whole picture. There was an ambulance taking away someone who was either sick or injured, and a small child walking hand-in-hand with his mother and his soda, emerging from the same restaurant. Perhaps what was most upsetting was that the small child had such a look of happiness on his face amidst all of this. To us as spectators, though, our hearts ached for him, as it seemed that the entire image of the restaurant that day was somehow a forecast of his life, if he continues to be sustained by fast food. I can only hope that this is not the case.

On another note, yesterday I was fortunate to share a deliberately slow meal with my dear friends Jack, Bridget and Peter. Our slow-paced meal was prepared primarily by Jack, who spent last spring in Rome learning to cook from his Italian host-mother and embracing the food culture of Italy. Amongst the many memories and stories shared with us, there seemed to be a resonating theme of Jack's Italian stories: slow food.

In keeping with the Italian theme of our dinner last night, I decided to prepare a little after dinner treat. After exploring the many lovely cooking blogs I like, I stumbled upon Smitten Kitchen's recipe for chocolate hazelnut biscotti. I must say, the recipe turned out great! We enjoyed them (slowly) with our after-dinner coffee.
For those of you unfamiliar with the Slow Food movement, perhaps the simplest way to introduce it is to consider its motto: Good, Clean and Fair food. Slow Food seeks to maintain and encourage small-scale food cultures that focus on local and sustainable meal times. In this case, it seems that sustainability encapsulates much more than environmental sustainability, to include cultural sustainability, economic sustainability and nutritional sustainability. This is on the Slow Food website:

"We envision a world in which all people can access and enjoy food that is good for them, good for those who grow it and good for the planet."

Interestingly, Slow Food has its links to McDonald's. The founder and president of Slow Food, Carlo Petrini, was outraged when he learned of McDonald's plan to open a branch in Rome in 1986. Fueled by his passion for food as an integral part of Italian culture, Petrini gathered forces and protested the restaurant. Petrini's efforts proved to be successful, as the McDonald's closed promptly. In 1989, Petrini founded Slow Food in order to continue to fight against the dominance of fast food.

As I opened with a grim image of a small boy walking out of a McDonald's with a grin and a soda, I would like to consider too, the positive image of an individual gathering forces with the common thread of slow food, in order to break the negative cycle of fast food. Deliberately eating has the potential to lead to so much good. For instance, my meal yesterday with my dear friends lead to a night of fun and good conversation; conversation that would in question not have occurred had we purchased our dinner in the drive-through line at a fast food joint.
As Jill and I have sought to reduce our processed food consumption, our diets have become noticeably slower. And thank goodness. We recognize farmers at the market and know the source of each ingredient. Our meal time conversations have spurred many a new idea and have lead to a personal level of awareness that I had not previously known.

Slow down. Happy eating!

Saturday, February 19

Lovely

Valentine's Day has come and past, but I have been feeling the love throughout the week. There is something so wonderful about Valentine's Day. I mean, really, it is a day to remember to love; and there are so many ways to express love, which is beautiful in it self. This Valentine's Day was particularly lovely, as I was greeted with flowers and a letter from a certain love of mine, as well as homebaked treats from my mother. Our candy bowl was perpetually filled and the sun was brightly shining, as were the faces of most on Valentine's Day. The whole day seemed pretty idyllic, to say the least. Thank goodness for love!
One of the treats my mother made, were her famous oatmeal raisin cookies! These are such a treat and as I have been working on my baking lately, I have tried (successfully, I believe) to make them myself. In fact, they are so simple, and delicious, that perhaps you might enjoy making them too.

Mom's Oatmeal Raisin Cookies
3/4 cup of shortening, softened
1 cup of brown sugar, packed
1/2 cup of white sugar
1 egg
1/4 cup of water
1 teaspoon of vanilla extract
1 1/2 cups of flour
1 teaspoon of salt
1/2 teaspoon of baking soda
3 cups of oats
Raisins

1. Beat together the shortening, brown sugar, sugar, egg, water and vanilla. In a separate bowl, mix together the flour, salt and baking soda. Add to the creamed mix. Gradually add the oats until they are well combined. Stir in the raisins (you can also add walnuts!).

2. Bake on a greased cookie sheet at 350 degrees for 12 to 15 minutes. Allow to cool before removing from the cookie sheet.
Bon appetite! 

In making them, I was happy to use oats from Oly, who we have come to recognize at the Milwaukee Winter Farmer's Market, and raisins from the Riverwest Co-op. I also used my homemade vanilla extract: such a treat, indeed!

I challenge you to try making these with local ingredients as well. It seems that delicious baked goods become a little tastier when they are made with ingredients that are associated with a smiling face and a personality.

Happy eating! 

Wednesday, February 2

Flour Weaving

Throughout the year, as the garden unit has been trying (quite successfully, if I might add) to eliminate package foods from our diet, I have been practicing the art of flour weaving. Some of my creations this year have included pita, chapti, pancakes (a variety of flavors), and bread.

Flour weaving involves all things flour and your hands. I am a big fan of working dough with my hands (no spoons necessary) and the movement of kneading- one of my favorite practices in the kitchen.

I have been reading up on breadmaking lately and the science behind it. To share some of what I have learned, its all about the gluten and kneading. By making the dough elastic-y through movement, the gluten is activated, leading to the production of gas bubbles which makes the bread fluffy and delicious when it comes out of the oven.


One of my latest flour weaving creations:
Honey Wheat Bread
(adapted from the More with Less cookbook- one of my favorite cookbooks)
Makes 2 loaves.

Ingredients:
2 tablespoons of yeast
3 cups of milk
pinch of sugar

First, warm the milk. It should be around 120 degrees (warmish). Then dissolve the yeast in the milk, along with a pinch of sugar. This is your starter.

3 cups of whole wheat flour

Add this flour to the starter. Allow this mixture to rest for about 10-15 minutes, it will become a bit bubbly.

1 tablespoon of salt
1/2 cup of honey
2 tablespoons of oil

Mix these ingredients in with the starter after it has rested.

4-ish cups of white flour (I used bread flour- which turned out well if you have it handy)

Last step for the dough, add the flour (a couple cups at a time) and mix with hands.

Now for the best part of breadmaking: kneading!
Knead until it feels right and until you are feeling really good about the day and about making something that has been created to share among friends since the very beginning. (Usually it takes me about 10 minutes or so)


After all that flour weaving, patience comes next. The dough must rise until it has doubled. I like to set the bowl on the oven, where it is quite warm. After it has doubled, split the dough in half. Then stretch the dough flat and roll it into a jelly roll. Place the rolls into the bread pans (which should be greased well) and then the loaves must rise again, for about 45 minutes.

Alright, you are getting close- final step: place the beautiful loaves into the oven at 375 degrees and bake for about 40 minutes or until golden brown.

Butter up and enjoy!

Happy weaving,
Jill.


When you live in the garden unit...

Sometimes you get snowed in!
Jilly at the front door...

Kelsey and the foraged snow

And how could we fully enjoy a snow day without snow ice cream? Snow ice cream has been a Clark family tradition for as long as I can remember. As kids, we would place a big metal bowl outside when there was even the slightest amount of snow falling from the sky, in hopes that our bowl would soon be filled so as to make snow ice cream. Often times, the bowl would only be lightly powdered after hours of patient waiting, but on a few occasions each year, it would fill enough to make a batch! Those were the best of snow storms. 

Needless to say, the blizzard that hit Milwaukee (and the rest of the Midwest!) last night, yielded enough snow that we could easily drop out of school and go into business making snow ice cream! For those of you who are also snowed into your respective homes, here is a treat that is sure to warm your soul, on even the coldest of snow days. 

Snow Ice Cream
Snow
Milk
Eggs
Vanilla
Sugar

1. Mix together one egg, about a cup of milk, a splash of vanilla and some sugar.

2. Gradually add fresh snow, until no more will mix in! And voila: Snow Ice Cream! Eat before it melts and share with those around you.

Happy (under)Groundhog Day and happy snow day!